Tutorial

So, like any high school senior, college is the number one thing on my mind currently. But since I'm obsessed with room makeovers and Pinterest, my future dorm room is also a often thought about topic. When planning the color scheme of my dorm room, coral immediately came to mind, but I had no idea what would go with it... until I pulled out my yarn.
I found that I liked the color combination of coral, white, grey, yellow and navy blue, so I decided to make a throw pillow that will hopefully be sitting on my new bed next year!
 |
| Craft Inspiration |
I got my inspiration from this pin on Pinterest, and decided to model my second pillow after it!
Here are the supplies you'll need:
- Yarn (colors of your choosing, however I would recommend you to also have white yarn for the back.
- Knitting needles
- Scissors
- Embroidery needle
- Pillow stuffing (once again, I just cut open an ugly pillow I got for cheap)

Step 1: Knit squares- lots of them. For this I casted on 8 stitches for each one and then knitted until it formed a square. For my project I made 9 squares in each color and then knitted a few extras to make the full rectangle but you can vary that based on the size of the pillow you want to make.
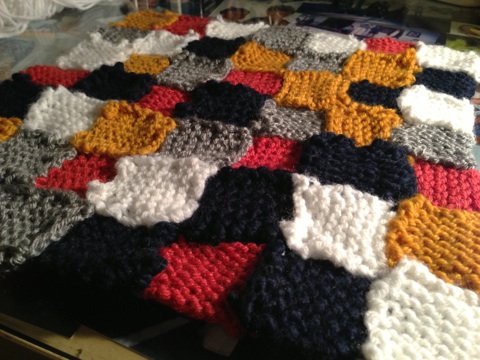
Step 2: Lay out all of your squares in your final formation.
 Step 4: Knit the back. I would do this step after the squares because then you can see exactly how large your pillow will be once the squares are all sewed together. For my back, I casted on 60 stitches and then kept knitting and measuring and knitting and then measuring until the back of the pillow cover the front.
 Step 5: Sew together the front and back using the embroidery needle. I found this fancy new way to sew together two knitted things and making it look nicer! You can check out the tutorial here.

Step 6: Add stuffing.
Step 7: Finish up by sewing together together the final hole and...
You're finished with your pillow!

Hope you enjoyed this tutorial! Let me know in the comments below how yours went or if you have any questions.
Happy crafting!
-Micayla
No comments:
Post a Comment